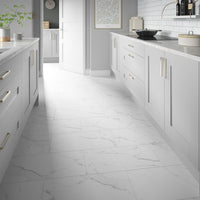
It's easy to see why floor tiles are such a popular choice for any room at home. With the charm of wood, the hardness of stone and the durability of vinyl, they'll offer a long lasting, stylish look in any space. But to ensure a perfect finish, it's important that your new tiles are correctly installed. Porcelain tiles, in particular, require a little more know-how and preparation than, say, laminate floors.

While we always recommend hiring a professional tiler, it’s possible to lay your own floor tiles, especially if you’re experienced at DIY. If that’s the case, please read on. Although every home is unique, this in-depth article covers what you need to know, step by step.
1. Before you start
We'll assume that you've ordered your new floor tiles and chosen your favourite laying pattern. If you haven't, these three articles are a good place to start:
- Buying Guide to Floor Tiles
- How To Measure Your Room
- Popular Floor Tile Laying Patterns
You can use this guide if you're installing ceramic and porcelain tiles to floors inside your home, including bathrooms, kitchens, hallways and conservatories.
If you're looking to install tiles outside, please refer to our Outdoor article.
2. Tools needed for floor tiling
You'll need quite a few tools to complete your project. Some of these are general household tools which you're likely to have. A few others are tile-specific, but they're a necessity.
While you can purchase these, it's also a good idea to hire tools from your local hire centre, especially if you're not likely to tackle another floor anytime soon.
General tools
- Tape measure
- Builder’s pencil
- Safety glasses
- Gloves
- Knee pads
- Rubber mallet
- Spirit level
- Drill with mixing paddle
- Mixing bucket
- Damp cloth
Tiling tools
- Tile adhesive
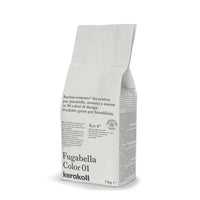
- Tile grout
- Tile cutter
- Bucket trowel
- Notched trowel
- Tile spacers
- Grout float
- Washboy
- Primer
- Grout sealer
3. What you can tile onto
Whether you're tiling a new room or looking to re-tile an existing floor, it's very important to consider your subfloor, or what you're tiling onto. Some of the most common subfloors in the UK include:
- 18mm WBP plywood
- Tile backing boards
- Existing tiles
- Vinyl floors
- Concrete and anhydrite screeds
While the actual act of tiling itself is the same, these different subfloors may require different preparation. Please take a look at the below articles for more in-depth information.
Although you can tile onto existing tiles, it's best practise to remove these and start afresh - you can read this guide to find out more.
Please note that it's not recommended to tile directly onto chipboard or floorboards.
4. Choosing the right adhesive for floor tiling
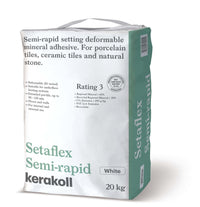
For floor tiling, it's imperative to use a cement-based flexible tile adhesive. These are generally available with different drying times and colours:
- Standard set adhesives offer you more 'working' time
- Rapid set adhesives cure quicker, so you can grout the same day
- Use white adhesive with lighter grout colours
- Use grey adhesive with darker grout colours
You will need to mix the adhesive with water, to the right consistency - we'll discuss this in Step 7 below. Always follow the manufacturer's instructions regarding mixing ratios.
Looking for more information on choosing tile adhesives? Please refer to this article.
5. Choosing the right trowel for floor tiling
You’ll need to use a notched trowel to spread the adhesive onto your floor. These feature either U or Square notches, in a variety of sizes.
Choosing the right size trowel is really important - as they help to ensure there’s a full bed of adhesive behind a tile. Read this article to find out more.
6. Preparing your floor for tiling
As with many building projects, the key to a great finish lies in the preparation. Essentially, the more time spent correctly preparing your subfloor, the better the end result - especially if you're tiling over an existing floor.
Tiles are inflexible so any movement or bounce in the subfloor must be kept to a minimum. Otherwise, issues may occur further down the line, including cracks in the floor or tiles coming loose.
So before you start tiling, it's vital to confirm that your subfloor is:
- Solid and stable, with no movement
- Dry and totally free of dirt and dust
- Level and flat, with no bumps
- Fully cured, in the case of concrete or anhydrite screeds
Levelling your subfloor
If your floor isn't completely level, or you're using underfloor heating mats, we recommend using a levelling compound. This will give you a solid, flat base that's perfect for tiling onto.
Refer to our How To Level a Floor For Tiling guide, for further information.
Anti-fracture mats
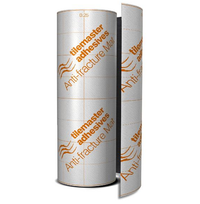
In our opinion, anti-fracture mats should be incorporated into almost all tiling projects. Also called de-coupling membranes, they're designed to help prevent the risk of your tiles cracking by absorbing some of the lateral movement in the floor below.
They're a necessity for larger floor projects, especially if you're using underfloor heating as the fluctuations in temperature can cause the subfloor to expand and contract.
Most anti-fracture mats are relatively thin and are fixed to the substrate using rapid-setting flexible tile adhesive. Once this has set, you can tile onto the top of the matting as normal. Please refer to this article for further information.
Waterproofing
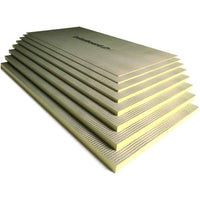
If you’re going to be tiling a ‘wet area’ such as a bathroom floor, we’d advise overlaying your subfloor with our Delta Tile Backing Boards.
When installed correctly in conjunction with a tanking kit, these boards are highly resistant to water. The tanking kit contains a waterproof tape and paste, which can be used to seal the joints between the backing boards and any screw heads. This will protect your home in the unlikely event of any leaks or water penetration.
Underfloor heating
Underfloor heating is a popular choice for modern family homes as it's efficient, easy-to-use and often means you can lose unsightly wall radiators.
You can choose between electric and water based systems. While they're suited to different projects, the principle is the same - the system sits underneath your tiles, and warms your room through radiant heat.
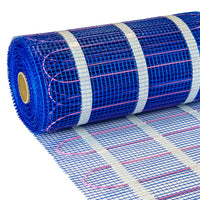
Our electric underfloor heating mats are ideal for any room, but are particularly popular in bathroom, kitchen and conservatory projects. If you're using these mats in your project, we recommend:
- Installing our Delta Tile Backing Boards over your subfloor
- Laying the heating mats onto the backing boards
- Pouring over a layer of levelling compound, to encase the heating elements and provide a perfect base for tiling
- Fixing our anti-fracture mat onto the levelling compound, before tiling as normal
The Delta Tile Backing Boards will ensure that your heating system is more efficient, by reflecting the heat up into the floor. Because of these temperature changes, some movement is to be expected. The use of an anti-fracture mat will accommodate this movement and prevent stresses transferring through to the tiles.
Priming
Just before you start tiling, we recommend priming your surface with a suitable primer, such as Prime Plus. It’s a vital - yet often overlooked - component of tiling.
Priming will help to:
- Stabilise and seal your subfloor
- Increase the strength of the adhesive bond
- Prolong the ‘working’ time of the adhesive
Usually, primer should to be touch dry before applying the adhesive. PVA should never be used in place of primer - for further information, please refer to our guide on tile primer.
7. Installing floor tiles
We're now ready to tile! Just before you make a start, it's always a good idea to 'dry lay' a run of tiles and ensure you're happy with the end result.
Mixing adhesive
Once the subfloor is correctly prepared, it's time to mix the adhesive. You'll need the drill and mixing paddle, together with the bucket. Time to don the safety goggles and gloves!
- Add the required amount of water to the bucket
- Add the required amount of adhesive powder to the water
- Don't add too much water as this may impair the strength
- Slowly mix to a smooth and lump free consistency
Tiling
Once the adhesive is mixed, we'd recommend working in small sections of around one square metre. You’ll usually start at the centre of the room, and work your way out to each wall - and ultimately, the door or exit.
- Using the bucket trowel, scoop adhesive out the bucket and onto your notched trowel
- Holding the notched trowel at a 45 degree angle, evenly spread the adhesive onto the floor
- Use the trowel to ‘comb’ the adhesive, helping to ensure a full bed behind each tile
- Place your first tile on the adhesive, with a light twisting and pressing motion
- Use the spirit level to make sure it runs true in both direction
- The rubber mallet can be used to gently tap and level tiles down, if required
- Place the next tile in the same way and insert tile spacers fully into the gap between the tiles, to ensure an even and consistent grout joint
- Continue until you reach the wall, where’s it likely you’ll need to cut a tile
Quality checking
As you progress, continuously check the quality of your work, in particular:
- Are the tiles running straight and level?
- Are they flat with no obvious lips between tiles?
- Are they - and the joints between - clear of adhesive?
Where necessary, you’ll need to remove and re-fit tiles you’re not happy with. It’s much easier now than once the adhesive has set! You should also use the damp cloth to wipe any adhesive off the tiles.
Tile levelling system
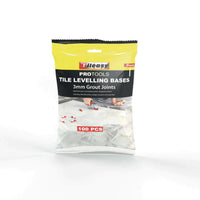
For tiles larger than 30 x 30 cm, we recommend using our Tile Levelling Clips in place of traditional spacers. Simple to use, these are designed to prevent lippage between tiles and ensure a flat finish. They must always be used when laying tiles with a staggered bond.
Back-buttering
For tiles larger than 45 x 45 cm, we recommend applying a thin layer of adhesive to the backs of the tiles before installation. This helps to improve adhesive coverage and ultimately, the strength of the bond.
Cutting tiles
It's more than likely that you're going to have to cut some tiles, especially around the edges of your room. Porcelain is extremely dense compared to other materials and you will need to use a high quality tile cutter.
- A manual tile cutter can be used for any straight cuts - these provide a quick and clean cutting method.
- For more complex cuts, we’d recommend a ‘wet’ tile cutter - they’re safer than an angle grinder.
With either cutter, you will need to use a high quality diamond blade or wheel. And a pro tip - as a seasoned tiler will tell you, it’s best to measure twice and cut once!
8. Grouting
Once you've fixed your tiles and the adhesive has set, it's time to get grouting.
Not only does grout provide an important function - stopping moisture and dirt getting in behind the tiles - it’s also considered a key decorative element these days. Contrasting grout colours add impact and highlight your pattern; co-ordinating grouts offer a more seamless style.
- Give the tile joints a quick vacuum to remove any lingering debris or adhesive residue
- Tile spacers can be grouted over, if they're fully embedded into the grout joint. Make sure there’s no tile spacers poking through!
Mixing grout
To mix the grout, simply add the required quantity to fresh water and slowly mix, using the paddle mixer. Once the grout is at the right consistency, allow it to stand for 5 minutes and harden slightly, before remixing for another thirty seconds or so.
Applying grout
Applying the grout is relatively straightforward:
- Add some grout to your grout float, using the bucket trowel
- Hold the float at a 45 degree angle and run the grout across the surface of your tiles
- Work in diagonal lines to your joints, to help push the grout into the gaps
- Work in smaller sections until you feel more comfortable
- Remove excess grout from the tiles, as you work round
Cleaning
Once you’ve filled all your joints, we recommend using the Washboy set to clean - these are designed for tiling and are far easier to use than a normal bucket and sponge.
- Moisten (not drench) the sponge and even the joints out by rubbing the sponge in a gentle circular motion over them
- After working a small area, clean the sponge, remove excess water by pushing along the Washboy rollers, and repeat until you’ve finished
- Don’t use too much pressure as this may dislodge or weaken the grout joints
9. Sealing your grout joints
While most ceramic and porcelain tiles don't need sealing, we recommend that you seal your grout joints. It can seem a bit of a thankless task, but trust us - it's worth it!
Most grouts are made from cement which is porous, so they're likely to stain over time. Sealing your grout joints ensures they're more resistant to staining and will look better for longer. And in fact, it's a pretty easy task if you use our Grout Protector spray.
10. Cleaning
It’s really important to clean your tools and tiles as you go. Adhesive and grout residue can - and will - get on your tiles and can be difficult to remove once they've set.
During installation
- Give the surface of the tiles a light wipe with a damp sponge to remove any adhesive residue before it hardens.
- You may also need to clean out adhesive from the grout joints. If this is the case, try not to dislodge any adhesive from underneath the tiles.
After grouting
- Make sure you regularly change the water in the Washboy, so you're not spreading grout residue over the surface of your tiles.
- Once your grout is set, it's a good idea to give your tiles a final clean with our Grout Stain Remover. This is designed to remove adhesive and cement from porcelain tiles, without damaging them.
Grout Haze
We haven’t finished yet! There’s a good chance that the surface of the tiles is covered in grout haze, which can sometimes be almost-invisible. Over time, this haze can cause the tiles to appear dirty as it’ll attract and trap dirt and dust.
You can easily remove the haze by polishing the tiles with a dry microfibre cloth, once the grout has almost set. For any stubborn grout haze stains, we’d recommend using the Grout Stain Remover product.
And finally
A great tiling job is part practice, part patience. So take your time - those extra few hours will be worth it, we promise!
