Unlike much of Europe, suspended timber floors are very common in the UK. In fact, whether you live in a period cottage or a modern dwelling, there’s a very good chance you have them in your home - especially on your first floor.
Unfortunately, there’s a lot of conflicting information on if, and how, you can tile onto timber. In this article, we’ll put the record straight, giving you full confidence to tackle your next tiling project.

Before we start
Just to be clear, in this guide we’re talking about tiling onto timber subfloors. You can’t tile directly onto a hardwood, engineered or laminate floating floor. These surfaces will need to be removed before you can start tiling.
Can I tile directly onto timber?
The honest answer? It depends. Yes, you can - if you have rigid tongue and groove floorboards that are in excellent condition. But if their condition isn’t great or you have a chipboard subfloor, then you won’t be able to tile directly to timber.
What are the issues tiling onto timber?
Although your current floorboards might look nice and flat, tiling directly onto them is likely to cause issues down the line. While wood floors are prone to movement and swelling, tiles are hard and inflexible. Overtime, any movement from the floorboards could cause your new tiles to crack, even if they’re made from super-hard porcelain. They could also delaminate, which is a technical term for coming loose.
There’s a number of reasons why wood floors expand, contract and swell:
- Wood can sag or crack if it’s not stiff, strong or supported well enough
- Wood can expand due to temperature changes
- Wood can swell if it gets wet - in a shower area, for example
How to assess your timber floor for tiling
Your current floor is likely to be either made up of tongue and groove floorboards or chipboard sheets.
Once you’ve determined which material your floor is, you’ll need to ensure that it’s clean, in good condition and strong enough to support the additional weight of tiles, without deflecting or bouncing. A rigid floor is essential to a long-lasting project.
An unscientific but popular way to check this deflection is to fill a glass of water to the brim and place it on your floor. Stand a metre away and jump on the spot. If water spills from the glass, there’s too much bounce in your floor - this will need fixing before beginning to tile.
How to tile to tongue and groove floorboards
It’s possible to tile directly onto existing tongue and groove floorboards, if they’re extremely stiff, stable and clean.
- Sand away any paint, varnish or finishing treatment
- Screw down any loose floorboards - be mindful of any wires or pipes that might be hidden underneath
- Seal the floor by applying a neat coat of Prime Plus
- Allow to dry then apply a second coat at 90° if required
- Lay tiles using a highly flexible 'S2' tile adhesive such as Tilemaster Ultimate.
- Please note that a normal porcelain tile adhesive is unlikely to be flexible enough to cope with the relatively high amounts of deflection still present in the floor.
- Grout joints with a flexible grout such as Tilemaster Grout 3000.
However, our professional advice is to strength your floor instead, by fixing plywood or tile backer boards directly to the floorboards. This is know as overboarding and we’ll discuss this in detail below.
How to tile to chipboard
For a variety of reasons, chipboard sheets aren’t an ideal base to tile onto. They tend to flex or bounce, and we often find they’re not screwed in well enough. So, if you do have a chipboard floor, you will always need to overboard this before tiling.
Chipboard should never be laid in a bathroom as it swells and disintegrates when wet. Even moisture-resistant chipboard should be regarded as a no-no in wet areas. Always use dedicated tile backing boards instead.
Why you should overboard wooden floors
More than likely, you’ll need to overboard your chipboard or floorboards with either tile backing boards or plywood.
Both of these materials will strength your current floor, decreasing the amount of movement that’s transferred through to the tiles and vastly reduce the chances of your tiling project failing over time.
How to overboard with plywood
Although our preferred option is to use dedicated tile backing boards, plywood is readily available at major stores. However, there’s plywood and then there’s plywood - we recommend using sheets of WBP or Marine Ply that are a minimum of 15mm thick.
- Use the largest sheets that you can feasibly fit into the room
- Plan your board layout to minimise the amount of joints and cuts
- For more accurate cuts, use a jigsaw instead of a handsaw
- Joints between boards should always be staggered
- Leave a small 1mm gap between boards and around the edges of the room, for expansion
- Screw the boards into the timber below at 15cm centres
- Please don’t nail the boards in, as they can become loose over time
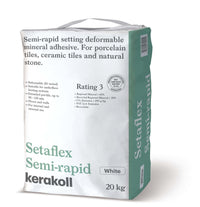
- Install your tiles using a high quality adhesive, such as Tilemaster Rapid Setaflex
You shouldn’t need to prime the plywood surface before tiling, although you may wish to seal any cut edges with primer, to make the boards a little more resistant to water.
While overboarding with plywood is the traditional option, there’s a number of disadvantages to consider. In recent years, the quality of ply has varied while the cost has increased dramatically. Furthermore, the thickness of ply adds significant height to your floor, which may impact on doors, kitchen furniture and the like.
For these reasons, we recommending using tile backing boards.
How to overboard with tile backing boards
In our opinion, dedicated tile backing boards should always be your first choice when it comes to overboarding wood floors. Their popularity has increased dramatically in recent years and they’re readily available, either from Porcelain Superstore or your local DIY store.
While different boards and thicknesses are available, the two most popular options are:
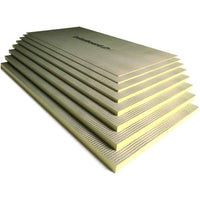
- 6mm cement backer board - ideal for overboarding floors in dry areas such as kitchens and hallways
- 10mm foam backer boards - ideal for wet areas such as bathrooms, when used in conjunction with a tanking system
As both options are slimmer than plywood, less height is added to your floor so there should be a more consistent level from room to room. Steps up into rooms should be avoided, where possible!
The foam backer boards tend to offer better insulating properties, so should be used if you’re considering an electric underfloor heating system. For further information on the advantages of tile backing boards - including how to install them - please read our article Tile Backing Boards - Everything You Need To Know.
Can I fix plywood directly to floor joists?
It you’re worried about floor heights, it can be tempting to remove your existing sub floor and fix thicker plywood directly to the joists. However, we do not recommend this as it’s incredibly time-consuming and expensive.
Can I tile onto plywood walls?
In 2018, the British Standard for wall and floor tiling was updated. It’s now not recommended to use plywood as a background for wall tiling, because:
- The quality of plywood is variable
- It can be degraded by water
- It can’t support as much weight per square metre as tile backing boards
For further information, please refer to our article on How To Tile Walls.
