Wood effect tiles have become immensely popular in recent years and it’s pretty easy to see why. Marrying the beauty of traditional hardwood with the practicality of porcelain, they’ll give any home a designer look to stand the test of time. They also offer plenty of environmentally friendly benefits over laminate and real timber flooring, as well.
And with just a little know-how, wood tiles are pretty straight-forward to install. In this article, we’ll look at some of the most popular laying patterns for wood tiles and guide you through the installation process, giving you the confidence to tackle your next tiling project.
Laying Patterns for Wood Effect Tiles
From the traditional to the trendy, there’s a number of different ways to lay wood tiles. It’s really important to think about your laying pattern when you’re evaluating different timber tiles. After all, the way a particular tile is laid can really affect the look and feel of your new room.
Staggered Bond

It’s no surprise that a random staggered bond is the most popular way to lay wood tiles. It’s how oak floors have been laid for centuries and you’re guaranteed to create an authentic, natural atmosphere in your room. Perfect for rooms both large and small, tiles should be laid with a random bond and the joints should be staggered by no more than a third of the tile’s length. You can lay both rectified and uncertified tiles this way.
Regular Bond

A more unique way to lay plank tiles is with a regular bond, where the tiles either line up straight or they’re laid with a consistent joint. This will give your floors a more contemporary feel, so it’s an ideal choice for modern interiors such as open living areas and designer wet-rooms. Please note that we don’t recommend laying wood tiles with a brick-bond joint - more on this below.
Crosshatch
An unusual way to lay wood tiles is with a crosshatch layout, where sets of planks are laid at right angles to each other. It will always make for an eye-catching floor, but can take a little more time to lay. We recommend using rectified tiles, to ensure a consistent grout joint throughout your floor.
Herringbone

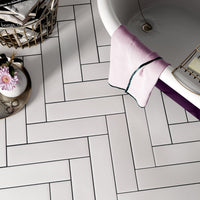
This is a classic laying pattern and with good reason - it looks good, just about anywhere. The tiles are laid at right angles to each other, forming a continuous zig-zag pattern. You can choose between a single or double herringbone - the first is more conventional, while the latter looks great over larger floors. Either way, this is the type of flooring that dreams - and Parisian apartments - are made of. Any plank tile can be laid herringbone, although we find that smaller formats tend to offer a more intricate finish.
Chevron

Like herringbone, the chevron pattern is a traditional flooring option that’s still incredibly popular. Unlike regular planks, the ends of chevron tiles are angled to give a seamless and continuous zig-zag pattern when laid. Tiling can take a little longer but the results will always be worth it - whether laid in a kitchen, hallway or living room, a chevron floor is the epitome timeless sophistication.
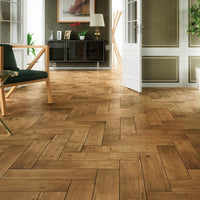
Parquet

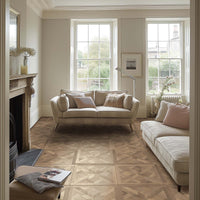
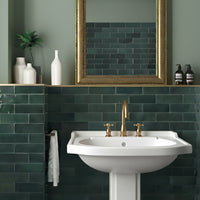
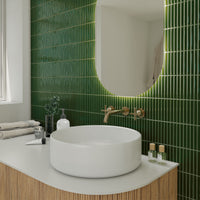
Perfect for luxurious interiors, parquet tiles will give you the coveted look of a classic inlaid hardwood floor. While the real deal is prohibitively expensive - both to purchase and to fit - parquet tiles come in large square blocks that are much easier to lay. Their geometric splendour is ideal for spacious rooms, but also looks classy in smaller areas. Why not marry a dark parquet floor with emerald green wall tiles in your bathroom, for a different take on the Modern Victorian look?
Installing Wood Effect Tiles
These days, the vast majority of wood effect tiles are made from porcelain rather than ceramic. So by and large, they’re installed in the same way as a normal porcelain floor tile - please see our How To Tile A Floor guide for further information.
However, there are a few points to bear in mind:
-
While it's always important to plan your layout before starting to fit tiles, it's particularly vital with herringbone and plank tiles. Small cuts next to a wall should be avoided where possible - slithers of tile are rarely a good look. It's a good idea to accurately draw out your floor on graph paper, and mark down individual tiles.
-
Compared to larger floor tiles, there's likely to be more cuts and waste when laying wood planks. We usually advise adding an additional 10% onto your order to cover this, but you may wish to add more. It's better to over order and be left with some spares, than under-order and have to wait for delivery.
-
As with almost all building work, the most important thing when laying wood tiles is preparation. Your subfloor should be as level as possible as long wood plank are less forgiving to deviations in the floor than smaller floor tiles. You may be able to level an uneven subfloor using self-leveller.
Read More: How To Level A Floor For Tiling -
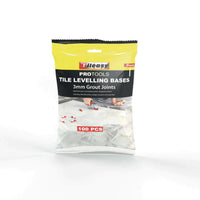
Long wood planks can bow slightly in the middle. This is due to the way that tiles are fired during production and isn't a defect or sign of price or quality - as long as the bow doesn't exceed a certain tolerance. However, because wood effect tiles are often laid with a staggered joint, any bowing can cause lippage issues, where the edge of one tile is slightly higher or lower than the tile next to it. Therefore, we always recommend using a tile levelling system when installing wood tiles - it's the best way to ensure a perfectly flat finish across your new floor.
Read More: How To Use A Tile Levelling System
Grouting Wood Effect Tiles
With all tiles, the width and colour of your grout joint can have a huge impact on the look and feel of your new floor. This is particularly true for wood effect tiles, where your chosen grout can either accentuate the natural style or provide a little eye-catching drama.
In our experience, closely matched grout colours are often paired with wood look tiles, to offer a seamless finish. However, this isn't a hard and fast rule, and your grout choice should be determined by the overall look you wish to achieve.
Read More: How To Choose Grout For Wood Effect Tiles
Cleaning Wood Effect Tiles
While natural wood floors are undoubtedly beautiful, they can stain easily and require specialist cleaning products. On the other hand, wood effect tiles are non-porous, so they're extremely resistant to staining and easy to care for.
A quick sweep with a soft brush will take care of and dust or dirt, while a mop and warm water should see to most spills and stains.
Read More: How To Clean Floor Tiles
However, it's really important that your new tiles are cleaned thoroughly both during installation and immediately after grouting, to remove any grout or adhesive residue. Otherwise, a very fine layer of cement may be left of the surface of the tiles, which can attract dust and dirt.
