

Looking to install outdoor tiles? In this article we’ll cover everything you need to know, so you can be sure of beautiful, long-lasting results - whether you’re hiring a professional or taking your project yourself.
There’s a few reasons why outdoor porcelain tiles have become so popular in recent years. Marrying the beauty of natural materials with the durability of tiles, they’re the perfect combination of form and function - a winning formula for a beautiful garden, in other words.
However, it’s important that porcelain slabs are correctly installed with the right fixing materials. In this guide, we’ll take you through the key stages of installing outdoor tiles, as well as providing tips for cutting, grouting and keeping your new space in perfect condition.
Please note that when we mention outdoor tiles, we're referring to porcelain pavers that are 18 to 20 mm thick and are designed solely for external use. We're not referring to normal porcelain tiles, unless mentioned explicitly.
Can I install outdoor tiles myself?
This is one of the most common questions we get asked. The answer, as you might expect, is that it depends - on what you’re tiling onto, your previous DIY experience and any tools you might have to hand.
For example, if you’re looking to lay a small number of tiles directly onto grass, then there’s no reason why you can’t tackle this yourself - especially if there’s no cutting involved.
On the other hand, if you have a large patio to tile in your dream family home, then it’s best to call in the professionals. After all, this is what they do everyday - and you’ll achieve a finish that meets or exceeds your expectations.
What can outdoor tiles be installed onto?
Thanks to their heavy-duty nature, outdoor tiles can be installed in a variety of ways onto different substrates. The right installation method depends on your garden and your preferences - while some methods are permanent, others are temporary and the tiles can be quickly lifted up, should you move home or wish to update your space.
We'll take a closer look at the four most popular methods, before delving into our recommended installation guidelines for each.
Hardcore Base
In our experience, this is the most common way to install outdoor tiles, especially in the UK. It involves digging out the area for your new patio, filling it with crushed hardcore and installing the tiles onto a bed of mortar, which is a mix of sand and cement.
Advantages: As the tiles are fixed in place, you're guaranteed a beautiful and permanent finish to your garden.
Concrete Base
If you're extending your home or moving to a new-build property, there's a high chance you may have a solid concrete base for your new terrace. Outdoor tiles can be installed to cured concrete using porcelain tile adhesives, in the same way as traditional indoor floor tiles.
Advantages: Tiles are permanently fixed in place and it's arguably easier to tile with adhesive instead of mortar.
Grass or Gravel
Unlike traditional tiles, which can crack if they're not fully supported underneath, porcelain pavers can be dry-laid onto grass, gravel or soil without fear of them cracking. This method doesn't require any 'wet' installation materials and is a popular choice for stepping stones across lawns and back yards.
Advantages: Once you've prepared your area, the tiles can simply be dropped into place. It's a quick and straightforward DIY option.
Raised Pedestals
A relatively new option is to lay your outdoor tiles onto dedicated plastic pedestals, without the need for grout or adhesive. It's a popular method for commercial terraces, balconies and rooftops, as any wires up pipes can be hidden in the cavity underneath the tiles.
Advantages: Once the pedestals are in place, tiles can simply be laid into place and removed when necessary.
What tools are required to install outdoor tiles?
Whichever method you choose, you'll need the tools listed below. You may also need to use some other tools, depending on your chosen installation method.
- The outdoor tiles themselves
- Measuring tape
- String line
- Spirit level
- Rubber mallet
- Shovel
- Gloves, kneepads and safety goggles
- LTP Porcelain Tile Protector
- Sponge or washboy system
- Wet tile cutter
- Soft brush
Installing outdoor tiles onto hardcore
This method involved digging out the area for your new patio, filling it with compacted hardcore before laying your outdoor tiles down using a bed or screed of sand and cement.
What you'll need:
In addition to the equipment above, you'll also require a cement mixer, MOT1 hardcore, sharp sand, cement, a whacker plate, spacers, grout or jointing compound and priming slurry.
How to install:
-
First, the area needs to be marked out and excavated. You'll need to dig out at least 150mm below the intended height of your finished floor, to allow for a 100mm level of crushed MOT1, 30mm of mortar and the thickness of the tiles, which is 20mm.
-
Fill the area with a level of MOT1, rake out and then compact it using the whacker plate, until it's nice and even. Repeat the process in layers, until you have a solid hardcore base that's at least 100mm deep.
-
You'll need to ensure that your base slopes away from any buildings. We recommend a minimum fall of 25mm every 1.5 metres in length. Use the string line to mark out the required gradient.
-
Prepare the mortar bed by mixing six parts of sand to one part of our ProPave Mortar. Although you can do this by hand, a cement mixer is much easier! Add water until you reach a firm consistency - you don't want a mixture that is runny, as this won't stand up to the weight of the slabs. Generally speaking, a orange-sized ball of mortar should hold it's shape, without falling apart. Please note, you can also use cement in place of our ProPave Mortar.
-
Apply a layer of mortar over the compressed MOT1 - we recommend a minimum height of 30mm. Use the edge of the spade to roughen the surface of the mortar up in preparation for the tiles.
-
Mix our ProPave Slurry Primer with water to a smooth consistency, then apply a thin layer to the reverse of each tile, using a small paint roller. This primer will help the non-porous slabs bond to the mortar bed and is vital to a lasting installation. If it's missed out, tiles can de-bond very quickly. Wipe up any primer that gets onto the front of the tiles as it's very difficult to remove, once set.
-
Slowly lower the first primed slabs onto the mortar bed. The best place to start is usually in a corner. Tap the slab down using the rubber mallet until it's at the desired height and use the spirit level to make sure you have an adequate fall, if required.
-
Once the first tile is in place, you can place the next tiles and work your way out. Use spacers to ensure an even gap between the slabs and make sure the tiles follow the required fall. Clean up any mortar as you go, using a damp sponge.
When all the tiles have been laid, please allow at least 48 hours before grouting, which we'll discuss in detail below.
Installing outdoor tiles onto a concrete base
Although a fresh concrete slabs can be expensive and time-consuming, they offer a very stable substrate. This means there's very little chance of tiles shifting slightly over time. As with the hardcore option, you'll need to make sure that your slab has an adequate fall designed in and, if it's fresh, has time to fully cure before tiles are applied.
What you'll need:
In addition to the equipment above, you'll also require a high-quality porcelain tile adhesive, notched trowel, spacers and grout or jointing compound.
How to install:
-
Ensure that your concrete slab is perfectly flat and sweep away and dirt or debris.
-
If required, seal the surface by applying a coat of tile primer.
-
Mix the tile adhesive with water, according to the manufacturer's instructions.
-
Apply the adhesive to the concrete slab and comb out, using the notched trowel.
-
Spread a thin layer of tile adhesive to the reverse of each tile, before they are fitted into place. This is known as 'back-buttering' and helps aid the bond between the tiles and the concrete slab.
-
Working in a corner, gently lower the first tile in place. Tap with the rubber mallet until the tile is at the required height and check the fall using the spirit level.
-
Once the first tile is in place, work your way out a tile at a time. Use spacers to keep a consistent joint between the individual slabs.
-
Wipe any excess adhesive away, using a damp sponge.
As above, once all the tiles have been laid you'll need to give the adhesive time to set, before grouting.
Installing outdoor tiles onto grass or gravel
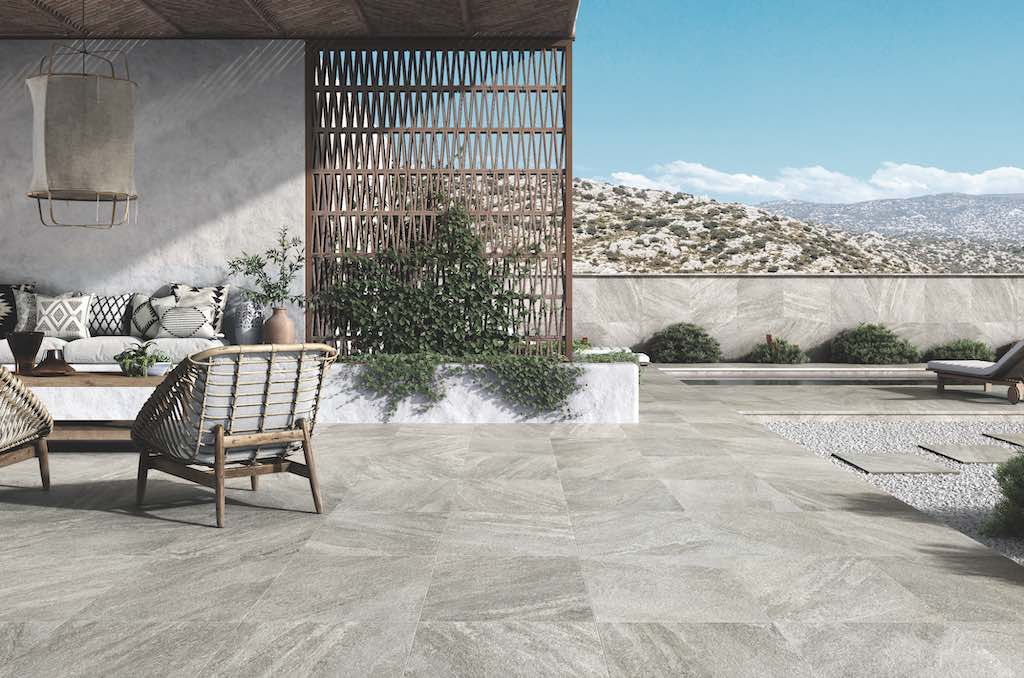
This is a very popular method if you're looking to lay outdoor tiles yourselves, or add a little extra style to your garden in the form of stepping stones. It's relatively quick and no special tools or materials are required. Plus, it looks fantastic, as the image below shows.

Although you can lay directly on top of your grass or gravel, in our opinion you'll achieve a better finish if the top surface of your tiles sits flush with its surroundings. This also ensures that when you're cutting the lawn, the blades of your mower won't catch the tiles and potentially damage them.
How to install:
-
Place the tiles in their final positions and mark around them using a spade. We recommend allowing for a minimum space of 50mm between individual tiles.
-
Move the slab and dig out the grass and soil to a depth of 80mm. Be careful not to remove too much of the surrounding lawn.
-
Fill the hole with fine gravel and compact down, until the gravel layer is a maximum of 60mm deep.
-
Carefully lay the tile onto the gravel tap gently with the mallet, until it's flat and stable.
When you're installing slabs using this method, you won't need to use any grout or jointing compound. Instead, the grass or gravel will form a joint that's attractive and functional - as they're porous, rainwater can easily drain away.
Installing outdoor tiles onto pedestals
Although this is the least common method of installing out door tiles, it's quickly catching on. There's plenty of benefits - you can fit the pedestals and tiles yourself without any mess, hide cables and pipes underneath the tiles and easily remove them, if you plan to move.

How to install:
- Ensure that the subfloor is stable and has a gradient so that water can flow to a drain.
- You'll normally need a pedestal in each corner of a tile, with a further pedestal in the middle to help distribute the weight.
- Start laying the pedestals and tiles in a corner. The tiles themselves should be flat and don't need to slope.
- The design of the pedestals ensures you will have a small, consistent joint between the tiles - the tiles butt up to spacer lugs on top of each pedestal.
- You can adjust the height of the pedestals where required, normally using a spanner or tool provided with them.
Once all the pedestals and tiles have been laid, that's it - job complete. There's usually no mess and as the tiles aren't grouted, you can use your new space immediately.
Please note that rainwater is designed to fall through the gaps of the tiles, so you'll need to ensure that the substrate underneath is waterproof and has an adequate fall built-in, where required.
How to cut outdoor paving slabs
As you might expect, at double the thickness of an indoor porcelain tile - which are already pretty strong - outdoor tiles are extremely hard. This means they can't be cut with a traditional 'dry' tile cutter or many angle grinders. Instead, you'll have to use tools designed for the task, namely:
- A flat bed 'wet' tile cutter with plunge capacity
- A petrol-powered cut-off saw
In either case, a continuous rim diamond blade that's designed for cutting 20mm porcelain tiles must be used. A traditional segmented blade can't be used for porcelain paving.
Furthermore, porcelain slabs should be cut slowly and the diamond blade should be kept cool with fresh water. This helps to wash the blade and suppress dust - which is extremely important when you're cutting any material. Cutting too quick can cause slabs to crack, while cutting dry will lead to chips.
And speaking of safety, always wear gloves, goggles, ear protection and a FFP Grade 3 mask. These are non-negotiable.
Straight cuts
When it comes to garden tiling, most cuts are likely to be straight. In our experience, it can be difficult to get an accurate straight cut with a cut-off saw and a wet tile cutter will give better results. We use a Rubi DCX-250 cutter with a Rubi SPT Premium blade.
- Mark the cut on the surface of the tile using a chalk pen or pencil
- Lightly score the tile with a first pass of the blade
- Cut the tile in a number of further passes, plunging 5 - 10 mm each run
- Let the blade do the work and be wary of it overheating, as this can lead to chipping
If you are using a cut-off saw, then lay the tiles on top of some old pallets and ensure they are well supported underneath, to minimise any vibration. Good practice is to cut a couple of centimetres into each end of the tile first, then join the cuts. This helps to reduce tension in the body of the tile and stop it from cracking.
Intricate cuts
Somewhere along the line, it's likely you'll need to cut around a gutter, gully or some other obstacle. A wet tile cutter might not be an option, so you'll have to use a cut-off saw or angle grinder.
- Mark the cut on the surface of the tile and score these lines first, to help reduce tension
- Gently pass the blade along the score lines and remember not to rush. Let the blade do the work!
- You may need to tap the cut section gently, to knock it away. Any excess material can then be trimmed away using the blade
- If you are using an angle grinder, be sure to take regular breaks to allow the blade to cool down
How to grout outdoor tiles
If you've installed your tiles using hardcore or onto a concrete slab, then you'll need to grout the joints either using a tile grout that's designed for outdoor use, or a brush-in jointing compound.
These don't just help provide an attractive finish, they also stop water penetrating into the substrate below, potentially causing issues further down the line.
Using tile grout
We recommend using tile grout when your slabs have been installed onto a concrete base. The grout must always be rated for external use. Our Grout 3000 products are up to the task.
- Thoroughly sweep the surface of the tiles and make sure the joints are clean
- Mix the grout with water to a smooth consistency, as per the manufacturer's instructions
- Apply and push the grout into the joints, using a rubber grout float held at a 45 degree angle
- Ensure the joints are completely full and wipe away any excess grout from the tiles
- Use a damp sponge or washboy system to clean the tiles, by gently wiping the surface perpendicular to the grout joints
We recommend only grouting when dry weather is forecast for the next 48 hours, as too much moisture can cause grout to cure incorrectly.
Sometimes after grouting there may be a very fine layer of cement dust on the surface of the tiles.This 'grout haze' can be invisible but will trap dust, causing the tiles to quickly look dirty and stained. Therefore, we recommend cleaning the tiles once the grout has set using LTP Grout Stain Remover.
Using jointing compound
Alternatively, you can use a 'brush-in' jointing compound to fill the joints between slabs. These are easy to use and don't require any mixing - as the name suggests, you simply brush the compound into the joints.
If you use our ProPave External Grout jointing compounds, please be aware that there are two different methods of application, depending on whether the substrate below the tiles allows water to drain or is impermeable.
If your substrate allows water to drain, then you should:
- Soak your tiles with plenty of water before
- Pour the jointing compound over the joint and brush down using a stiff brush
- Keep both the tiles and compound wet throughout the process, by continually spraying with a hose. As the water drains, it helps to compact the jointing compound
- Once the joints are completely full, soak the entire area and wash away and excess jointing compound
- The compound will cure and harden as all the moisture in the joint drains into the ground below
If your substrate is made from concrete and is impermeable, then the process is slightly different:
- Gently wet the tiles with a mist spray of water - avoid flooding the joints
- Pour the jointing compound over the joint and brush down using a stiff brush
- You'll need to use a pointing trowel and jointing iron to compress the material into the joint
- Repeat the process if required, until a suitable level is reached
When a jointing compound is used, you can usually walk on your patio within 48 hours although it may take up to 28 days to fully cure.
Whatever method of grouting you choose, it's important that the grout always finishes slightly below the level of the tiles. The tiles themselves must always be the 'wear' level of your finished patio.
Sealing Outdoor Tiles
Outdoor tiles are impervious to water and strictly speaking, don't need to be sealed.
However, we do recommend that our Porcelain Tile Protector is applied to any outdoor tiles, before they are grouted. Many outdoor tiles have a textured or gritty surface which can easily trap excess grout or residue from brush-in compounds, if they're not thoroughly cleaned immediately after installation.
A protector will help protect against these and other stains, without altering the appearance of your new patio tiles.
We've covered a lot of information here, but just get in touch if you have any further questions. We'd love to help!
And don't forget - if you're looking for new outdoor tiles, why not check out our buying guide, to help you make the right choice?