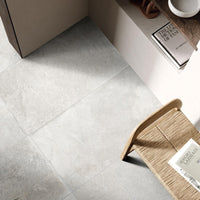
When you want to replace a ceramic tiled floor, you are normally faced with the task of removing the old tiles. While some of today’s thin porcelain tiles are billed as being suitable for over-tiling, in most instance the resultant increase in the overall thickness of the floor precludes this option.
Removing ceramic or stone floor tiles is technically simple but can require considerable effort. Depending on the sub-floor - and the installation method originally used - it can be backbreaking work, especially with older installations.
Lifting The Old Tiles
If you encounter one of these floors it may be worth hiring in a piece of specialist kit, such as a hand-held power scraper. These are perfect for fine chipping work. For larger or more challenging floors, hiring a wheeled-mounted medium- or heavy-duty floor tile lifter should guarantee efficient removal of old tiles, and adhesive. The better machines have a fully adjustable chassis to set the perfect blade angle, and large diameter wheels for excellent mobility and stability.
Whether you need to hire in specialist kit or not, undertaking your own removal can result in significant cost saving, since this job is so labour intensive, particularly if the tile was set into a base of steel-reinforced solid mortar or directly on to a concrete slab.
Removal is far easier if the tile was fixed to plywood or cement board. When purpose-formulated tile adhesives came on the market in the 1970s, floor tiles could be adhered directly to a plywood or cement-board underlayment. This system quickly replace the traditional mortar-bed system. With this kind of installation, the bond between tiles and substrate is relatively easy to break.
Floor tile removal from a plywood or cement-board substrate only requires basic hand tools, although a hammer drill with a chisel attachment can speed up the process. However, a hammer drill can also wreak havoc with the plywood or cement-board sub-floor, so be prepared for some repair work if you use this kind of tool.
Mind The Dust!
The DIY tiler should also be aware that tile removal can generate a huge amount of dust. It is a good idea to tape off your work area with plastic sheeting to prevent dust particles from spreading needlessly through your home.
Always wear a dust mask, eye protection, hearing protection, and heavy-duty work gloves when removing old tiles. The hammering and chiselling action can kick up shards of tile or adhesive that can seriously damage to your eyes. Tile shards of broken tile can also be razor sharp, so wear long sleeves and tough gloves during the demolition.
Waste
Ceramic tile demolition can also generate a significant amount of waste, especially for large floors. An empty bulk bag, such as those used by builders’ merchants for sand or ballast, is ideal for gathering this debris in one place.
You Will Need...
So before you start the process, make sure you have the required equipment to complete the tile removal process. Porcelain Superstore recommends:
- Dust mask
- Safety goggles or alternative eye protection
- Crowbar or flat-edged pry bar
- Claw hammer
- Ear plugs or similar hearing protection
- Heavy-duty work gloves or riggers
- Flat-edge shovel
- Heavy-duty floor scraper
- Bolster or masonry chisel
- Sledge hammer
- Old bucket, box or wheelbarrow
- Broom
- Dustpan and brush
- Vacuum cleaner
- Plastic sheeting
- Masking tape
- Heavy-duty plastic rubbish bags
- Empty bulk back for debris
Always Prepare!
Before you begin, take some time to prepare your working area so you don't accidentally damage other things in the room. Use a flat-edge pry bar and hammer to remove all mouldings, trim, door frames, and doors that will interfere with the tile removal. This prevents them from getting damaged or covered in dust during demolition.
Cover open doorways with sheets of plastic to control dust. It is also a good idea to cover up your bath, sink, or shower trays. If large, sharp pieces of tile are fired into your bath tub, shower tray or sink, they may cause scratches. Cardboard is good for protecting these spaces from falling tiles. For extra protection, drape an old sheet over them, as well.
Where To Start
Begin at the edge of the floor in a spot with easy access, such as a doorway. Wearing your dust mask and safety goggles, use the sledgehammer to break up the tile along the grout lines. Be extremely careful, especially when dealing with porcelain tile, as the sharp edges can cut like glass.
The first tile you’ll remove will be the hardest, as there is usually no easy access from the sides. Using the butt of the hammer, prod the corners of random tiles. Try to feel for a loose one, as this will be easier to remove. If you do find a loose one, prize it out with the chisel. If you don’t find a loose one, you will have to break one. Stick the chisel in the centre of one tile, and hit it with the hammer. This should shatter the tile, and you’ll then be able to remove the individual pieces.
Once you’ve removed one tile, there should be easy access to gaps behind surrounding tiles. Simply sit the chisel against the floor, with its point tucked behind the tile you’re working on, and tap it with the hammer, so that it sinks neatly behind the tile. Then, pull the chisel slowly towards you, so that it prizes the tile from the floor.
If you have to use a sledgehammer, use it with care, as repeated heavy blows can damage the structural framing that supports the sub-floor. Only use just enough force to break the tiles so that the floor scraper can do its work. Once you have freed some of the tiles by chiselling/hammering, find a space to get the floor scraper underneath the tiles, and then pry them up one by one. The more tiles you can pry up, the less chiselling/hammering will be required, which makes the job faster, easier, and less messy.
Use the floor scraper to remove all remnants of the tiles, prying them off of the sub-floor. A flat shovel can also work for this job. Do note that many floor scrapers are made to use either face up or face down, so try both to see which way works best. Using the scraper the right way makes this task much easier.
Work your way across the entire room, removing all tiles. You may need to use a hammer and masonry chisel to remove any traces of tile adhesive and grout that remains stuck to the sub-floor after the tiles have been removed.
You may get lucky when removing the tiles from a floor and find that the adhesive is pliable and can be easily peeled off the floor, making the job a piece of cake. Or, you may find that the adhesive is like as hard as concrete (it may well have a cement base) and is almost impossible to dislodge.
Retiling?
If you are planning to retile the floor – and we really hope you are - you want to get the floor as smooth as possible after removing the layer of tile. Your new tiled floor will require a smooth base and careful application of these smaller tools will help you to achieve that.
Remove the hard adhesive residue from the sub-floor by hammering. Hammer on a 2- to 3-foot-square section of the floor to smash up the remaining adhesive, and then use the floor scraper or shovel to scrape the broken pieces of adhesive off the sub-floor. If this doesn’t remove most of the adhesive, it is probably easier to replace the sub-floor.
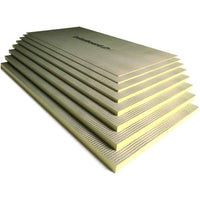
Depending on the condition of the underlayment, and the requirements of the new flooring, it may be simplest to remove the existing cement board or plywood underlayment at this time. If the underlayment is badly damaged, or if the new flooring requires a different type of underlayment, now is the time to remove and replace the old underlayment. For instance, plywood is no longer considered a suitable sub-floor for tiles and should be replaced by a purpose-manufactured cement-based tile backer board.
Removing an only sub-floor is usually best done by cutting the underlayment into manageable sections, using a circular saw with the blade set to the same thickness as the underlayment. Once the underlayment is cut into sections, it can be unscrewed or pried up for removal.
If you are installing new ceramic tile, existing cement board underlayment can be reused as the base for the new tile, provided it is intact and firmly bonded to the subfloor.
Use a scoop shovel and broom to remove debris. Sturdy contractor trash bags can be used to hold debris for disposal. Check with local authorities on disposal requirements; you may need to arrange for the transport this material to a specified construction waste disposal site.
Complete the clean up by using the broom, dustpan and brush, and - finally - the vacuum cleaner to remove any remaining dust. The dust will take many hours to settle, so several passes with the vacuum cleaner may be required.
