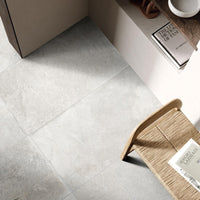
When tiles are installed, the edge of one tile can sometimes be slightly higher or lower than the edge of the adjacent tile. This height difference is know as tile lippage and it’s not particularly desirable, as you might expect. It doesn’t look attractive and in the case of floor tiling, it can create a trip hazard.
In this article, we’ll look at why lippage occurs and how to eliminate it, for the perfect tile installation.

Why does lippage happen?
Lips between tiles can happen for a number of reasons. Although fingers are often pointed at the tiles or the tiler, it’s usually a combination - and poor substrate preparation can accentuate the problem.
- Porcelain tiles may look perfectly flat but they tend to warp slightly over their length. This is less noticeable on smaller tiles, but is more obvious on larger tiles - and of course, tiles have been growing in size in recent years. This bowing isn’t usually a fault but can contribute to lippage, especially if tiles are laid with a staggered bond.
- As tiles have become larger in size, it’s become even more important to ensure that the substrate below is perfectly flat and level. An uneven subfloor gives less margin for error as porcelain tiles are rigid and can’t cover over any imperfections.
- Sometimes, it’s down to human error. Your installer may be inexperienced, rushing to finish or not using the correct tools. They may have different quality standards, which is why it’s always wise to choose a professional tiler and discuss your expectations in advance.
How to avoid tile lippage
Once they’re installed, tiles are permanently fixed in place. This means that lippage can’t be fixed when the adhesive has dried - it’s therefore vital to avoided the potential for raised tile edges from the outset.
Correctly prepare your subfloor
It’s impossible to overstate how important a flat, level subfloor is when tiling. According to British Standards BS 5385, the best way to check this is by laying a 2m long straight edge over the surface - the maximum acceptable tolerance is ± 3mm. If your subfloor exceeds this, you will need to even it out using a levelling compound.
Read more - How To Level A Floor For Tiling
Use tiles from the same batch
Natural stone tiles can vary in thickness, which can cause havoc during installation. Although this is less of an issue with porcelain tiles, it’s best to err on the side of caution and make sure your tiles are from the same batch. Always over-order - having a few spares tiles is always better than having to re-order tiles from a potentially different production run.
Buy better tiles
Our porcelain tiles are made in Spain and Italy to strict European standards. So as you might expect, they’re of higher quality than commodity tiles produced elsewhere. Although the relevant standard for porcelain tiles allows for bowing of up to ± 0.5% we find that most of our tiles fall well under this threshold. However, this does mean a 120cm long tile can bend up to 6mm and still be deemed acceptable.
Choose a suitable laying pattern
We don’t recommend that tiles larger than 30 x 60 cm are laid with a traditional 50:50 brick bond, as this may accentuate any lippage. Instead, they should be laid with a maximum offset of 33% to minimise the potential for lips between the edges.
Use a grout joint
Although seamless floors are often desired, tiles should always be laid with a grout joint. Not only does this absorb some movement, it also improves the transition from tile to tile, making any height discrepancy less evident. So always use a grout joint and never butt tiles up.
- Use a 2mm joint between rectified tiles
- Use a 3mm joint or larger for un-rectified tiles
- Use wider spaces for tiles with wavy edges
Use a tile levelling system
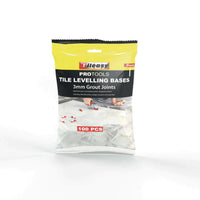
Incredibly simple to use, tile levelling systems should be used on almost all floor tiling projects, especially if your tiles are 30 x 60 cm or larger. They are designed to lock the tiles together while the adhesive sets, giving you a surface that’s flat and level without the need to constantly check it during installation.
Read more - How To Use A Tile Levelling System
Apply adhesive correctly
Tile adhesive should be applied to the substrate by holding a notched trowel at a consistent angle, to ensure a thick and even layer. You should never lay tiles with dot and dabs of adhesive, as not only does this leave weak spots behind the tiles, it causes issues when trying to level and align tiles.
